21 Daysof making things
Photography and filmmaking fundamentals. One thing to finish every day, each taken from a book or course you can go and check for yourself.
Week 1Stills — composition, angle, exposure
Week 2Moving pictures — sequence and continuity
Week 3Cutting and finishing
Finished beats goodA rough piece that exists beats a great one
you're still fiddling with.
Show every one to a humanMaking it for someone changes how
you make it.
Don't buy anythingYour phone is the camera. On day 21, buy a
microphone — not a camera.
01
Week 1 · Stills
Twenty-four from one spot
20 min24 photos
Photographers talk about working the subject: staying with one thing until the picture appears, rather than wandering until you trip over one.
Standing still removes your easiest move. What is left are the decisions that actually make a photograph — where you point, how high you hold the camera, what you allow into the edges of the frame. The first few shots will be the ones already in your head; the interesting ones start after you run out.
Stand in one place and take twenty-four different photographs without moving your feet. Look up, down, close, far. Keep all twenty-four, including the bad ones.
No Film School, “Two Dozen” workout
Twenty-four from one spot
02
Week 1 · Stills
The five shot sizes
15 min5 photosTogether
Shot size is measured against the human body, not against distance: a long shot holds the whole figure, a mid shot cuts at the waist, a close-up is head and shoulders.
Size is how you control what the audience knows. A wide frame says where we are and how someone stands in a place; a close-up says what they feel and hides everything else. Walking closer changes the relationship between subject and background — zooming only magnifies what you already had.
Pick one subject and photograph it five times: extreme long, long, mid, close-up, extreme close-up. Move your feet for every one of them.
Learn About Film — shot size; Mascelli — close-ups
Try it — five sizes
Slide through the five shot sizes on one subject.
03
Week 1 · Stills
Four corners
15 min8 photos
The rule of thirds is a rough modern statement of a much older idea about where the eye comes to rest.
Put the subject dead centre and the frame goes static and symmetrical. Move it off centre and the empty space starts working, because the eye reads a gap as somewhere to go. That space usually belongs in front of a person, so they have room to look or walk into; the same gap behind them makes a picture feel cramped without your being able to say why.
Take eight photographs with the subject near a corner or an edge, never the middle. Then take one centred version and put them side by side.
No Film School, “Four Corners”; Learn About Film — composition
Try it — drag the subject
Drag the person around the frame; the verdict changes as you go.
04
Week 1 · Stills
High, low, level
10 min3 photosTogether
Camera height is read as power, and it costs nothing but bending your knees.
From below, a subject looms over the lens and over you. From above, they shrink into their surroundings. Neither is automatically right, and leaning on either is a strong stylistic choice — but eye level is not neutral either. It is a decision to meet someone as an equal, which with a child means getting down to their height instead of filming the top of their head.
Photograph the same person from below, at eye level and from above. Change nothing else between the three.
Learn About Film — camera position and angle; Mascelli — camera angles
Try it — three heights
Switch between low, eye-level and high camera positions.
05
Week 1 · Stills
The exposure triangle
20 min6 photos
Aperture, shutter and ISO all buy the same thing — light — but each pays for it in a different currency.
Aperture pays in depth of field: open it up and the background dissolves. Shutter pays in time: leave it open longer and anything moving smears across the frame. ISO pays in noise. That is the whole reason ISO is the one to raise last — the other two give you something back for the light they gain, and ISO only gives you grain.
Switch to manual or pro mode. Shoot the same scene changing only aperture, then only shutter, then only ISO. Two frames each.
Exposure triangle — standard photography fundamentals
Try it — the triangle
Pull aperture, shutter and ISO; watch depth of field, motion blur and noise appear.
06
Week 1 · Stills
Photo story
30 min8–12 photosTogether
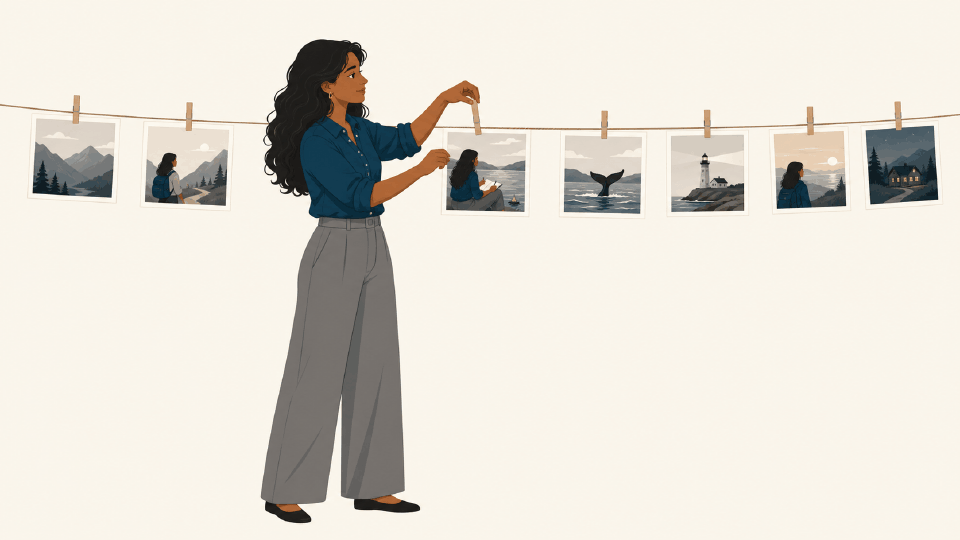
A story told in stills has no sound, no movement and no dialogue to lean on, which is exactly why it comes before video in the classic film-school progression.
What you are practising is the order of information: what the audience needs first, what can wait, and what should be held back. Photographs force you to choose moments rather than record everything and hope.
Tell a small story in eight to twelve photographs — someone loses something and finds it, someone makes breakfast. Put them in order and show them to someone without explaining. Watch their face rather than asking whether they liked it.
Film School 101 assignment #1 — Photo Stories
Photo story
07
Week 1 · Stills
ABCDEF review
25 minReview + 3 reshootsTogether
Checklists beat taste while you are learning, because taste tells you a frame is bad without telling you what to change.
Learn About Film's list runs through the failures worth catching: what the shot is about, the background, the composition, the depth, the exposure, the focus. Most weak frames fail on the background — something growing out of a head, a bright object stealing the eye — and that is the cheapest fault in photography to fix, because it usually takes one step sideways.
Go back through the week and check every photograph against those six. Find your three worst frames and shoot them again properly.
Learn About Film — the ABCDEF shot checklist
The check
AAngle — high, low or level?
BBackground — anything growing out of their head?
CComposition — where in the frame?
DDistance — which shot size?
EExposure — too bright or too dark?
FFocus — is the right thing sharp?
08
Week 2 · Moving pictures
The basic sequence
20 min30 secTogether
Wide, then medium, then close. Schroeppel calls it the basic sequence, and almost every scene ever cut is built on it.
It is less a rule than the order in which an audience asks questions: where are we, who is this, how do they feel. Film the whole action at each size rather than a fragment, so the same moment exists three times over. Editors call that coverage, and its absence is the commonest reason a scene cannot be assembled afterwards.
Film one simple action three times — once wide, once medium, once close — and cut them together in that order. That is your film.
Schroeppel — “basic sequence”; Learn About Film — open on a long shot
Try it — press play
Play the wide → medium → close sequence.
09
Week 2 · Moving pictures
Match on action
20 min20 secTogether
Cutting while something is moving hides the join, because the eye is busy following the motion and never registers the change of angle.
The trick is overlap. Film the entire action from both positions so the same movement exists twice, then find the frame where the two match. Cutting between two static shots announces itself; cutting halfway through a door opening is close to invisible.
Have someone open a door, pick up a cup, sit down. Film the whole action from one angle, then the whole action again from another. Cut from one to the other in the middle of the movement.
Learn About Film — match on action; Film School 101 assignment #2
Try it — cut on the move
The same movement filmed twice — cut it on the move, then cut it still.
10
Week 2 · Moving pictures
The 180-degree rule
20 min30 secTogether
Draw an imaginary line between two people and keep the camera on one side of it, and screen direction holds: she looks right, he looks left, and the audience believes they are facing each other.
Cross the line and they appear to swap sides, or to both look the same way, and the geometry of the room quietly collapses. Mascelli treats this as the foundation of continuity. Crossing it by accident is one of the classic editing-room disasters, because no amount of cutting rescues it afterwards.
Film two people talking, keeping every camera position on one side of the line. Then film it again crossing the line on purpose, and watch both.
Mascelli — continuity; Learn About Film — 180-degree rule
Try it — cross the line
Drag the camera across the line and watch the two people swap sides.
11
Week 2 · Moving pictures
Shot-reverse-shot
20 min45 secTogether
When you change angle on the same subject, move at least thirty degrees.
Less than that and the two shots are too alike: the cut reads as a stutter or a fault rather than a new point of view. Put this together with yesterday's line and you have most of how dialogue is actually shot — two over-the-shoulder setups on one side of the axis, far enough apart to cut cleanly, matched in height and size so the two people appear to share a room.
Film the same conversation as over-the-shoulder shots, cutting between the two faces, moving well past thirty degrees each time you reposition.
Learn About Film — shot-reverse-shot, eyeline match, 30-degree rule
Try it — open the angle
Open the angle between two cameras and see where the cut starts working.
12
Week 2 · Moving pictures
Hard light, soft light
20 min30 secTogether
Hard light comes from a small source and leaves sharp-edged shadows; soft light comes from a large one and wraps around a face.
Size here is relative to the subject. The sun is enormous but so distant that it behaves like a small source and lights harshly — until cloud turns the entire sky into the lamp and it goes soft. That is why the best free lighting kit is a north-facing window or an overcast afternoon, and why noticing where the light already comes from beats buying anything.
Film a face in direct sun or under a bare bulb, then in window light or through a curtain. Then film one shot with the light behind them, and fix it.
Schroeppel — lighting; Learn About Film — light and colour
Try it — move the light
Drag the light around the face; switch between hard and soft.
13
Week 2 · Moving pictures
Sound is half of it
15 min45 secTogether
An audience forgives a soft picture and will not forgive bad sound, which is why sound is described as half the film.
The single biggest improvement available to you is distance. Halving the gap between microphone and mouth roughly quadruples the voice against the room, so where you put the mic matters more than any setting on it. Record thirty seconds of room tone in every location too — silence that matches the space, which an editor uses to patch holes.
Record the same sentence with the phone three metres away, one metre away, and a hand's width away. Listen to all three on headphones.
Schroeppel — sound chapter
Try it — move the mic
Slide the microphone closer and watch the voice rise out of the room noise.
14
Week 2 · Moving pictures
What's in the Box?
25 min20 secTogether
Tension lives in withholding, not in revealing.
The shot sizes tighten as she approaches, which accelerates the scene without anything moving faster, and the reaction is cut to before its cause, so the audience reads her face and imagines something better than you could ever show them. Never opening the box is the point: the moment you show the contents, the scene ends and everyone discovers you had less than they had invented.
Plan the scene shot by shot before you film anything. Someone finds a small box and you never show what is inside.
Learn About Film — named beginner exercise
One worked answer — 15 shots
A worked example: all fifteen shots, with what each one is doing.
15
Week 3 · Cutting & finishing
Open the editor
15 min1 clip
An assembly is the first pass: the keepers laid end to end in order, with no polish at all.
What you are really doing is throwing things away. Most footage is dead time — the fumbling before an action starts and the drift after it ends — and cutting is subtraction long before it is arrangement. Editors talk about finding the film inside the material rather than building it.
Install CapCut or DaVinci Resolve. Drag in one clip from any day so far, and cut the dead time off both ends of it.
Schroeppel — editing chapter
What an assembly looks like
See what an assembly looks like — every clip, dead air included.
16
Week 3 · Cutting & finishing
Join two clips
20 min2 clips
A cut is an instantaneous change of viewpoint, which the brain accepts easily because it does something similar every time your eyes move.
It only becomes visible when nothing was happening on either side of it, or when the two shots are so alike that the join reads as a jump. Trim until the action is already running as the shot begins, and the cut disappears into the movement.
Put any two of your clips end to end. Trim the fumbling off the start and the end of each until they run straight into one another.
Mascelli — cutting; Schroeppel — editing
Try it — move the cut
Drag the cut point through a movement and see where the join hides.
17
Week 3 · Cutting & finishing
Hide a cut
20 min1 clip
B-roll is not decoration. It is a repair kit.
Laying a cutaway over a join lets you remove any amount of someone's speech without the picture jumping, because the audience never sees the two mismatched halves meet. That is why interview shoots gather hands, faces, the room and the work — not because they are pretty, but because every one of them is somewhere to hide an edit.
Take a clip of someone talking. Cut a few seconds out of the middle, watch the join jump, then lay a cutaway over it and watch the jump vanish.
Learn About Film — match on action and cutaways
Try it — hide the jump
Watch a jump cut appear, then disappear under a shot of her hands.
18
Week 3 · Cutting & finishing
A short montage
20 min15 sec
A montage compresses time by showing fragments and trusting the audience to assemble the rest.
It works on busy subjects — cooking, training, building — because each shot has to be legible in half a second, and only heat, movement and colour read that fast. The rhythm matters more than any single shot in it. Cut too long and it stops compressing anything and quietly turns back into an ordinary scene.
Pick six to eight shots you already have and cut them into fifteen seconds. Try it faster and slower until it stops feeling like a slideshow.
Schroeppel — montage chapter
Try it — set the pace
Eight shots of one job — change how long each is on screen.
19
Week 3 · Cutting & finishing
Slide the sound
15 min1 cut
Picture and sound do not have to cut in the same instant, and prising them apart is one of the quietest tools in editing.
Bring the next shot's sound in early — a J-cut — and you hear a room before you see it, so the change feels led rather than abrupt. Hold the outgoing sound over the new picture — an L-cut — and a conversation flows across the join. Almost every dialogue scene you have ever watched does this constantly, which is precisely why you have never noticed it.
Take one cut from any day this week and slide the sound a few frames earlier than the picture. Then slide it later. Listen to the difference.
Standard continuity editing practice; Schroeppel — sound and editing
Try it — hear it before you see it
Play a two-person scene and slide its sound early or late.
Try it — hear the join
Two takes cut together raw, then levelled with room tone underneath.
20
Week 3 · Cutting & finishing
Put a name on it
15 min1 title
A lower third names whoever is on screen, and its whole job is to be read and then forgotten.
Keep it inside the title-safe area, roughly the middle ninety per cent of the frame, because phones, televisions and social platforms all crop the edges differently. Hold it long enough to be read twice at a comfortable pace, and set it against a calm part of the picture rather than across somebody's face.
Add an opening title and a caption naming whoever is on screen. Keep both inside the safe area and time them by reading them aloud twice.
Broadcast title-safe convention (not a specific book)
Try it — set a title
Put a name on the picture, inside the safe area, and time how long it holds.
21
Week 3 · Cutting & finishing
Make the real thing
90 min60–90 secTogether
Everything until now has been drills. This is the first thing with an audience.
Finish it and show it, because a rough film that exists teaches you more than a good one you are still adjusting — you find out what you actually got wrong only when someone else watches it in front of you. If you buy one thing after this, buy a microphone rather than a camera: your phone's picture is already better than its sound.
Film and cut a real sixty to ninety second video about something you care about. Show it to someone who was not there.
Film School 101 assignments #4 and #5 — two-person conversation, short film
Make the real thing
§
Sources
Where this comes from
- The Bare Bones Camera CourseTom Schroeppel — 200,000+ copies, adopted by 700+ college courses. Exposure, lenses, composition, the basic sequence, crossing the line, lighting, montage, sound, editing. Read it
- The Five C's of CinematographyJoseph V. Mascelli — camera angles, continuity, cutting, close-ups, composition. Named by American Cinematographer as one of the three most important books on cinematic technique. Read it
- Learn About FilmFree structured film education. The shot-size progression, the ABCDEF checklist and the “What's in the Box?” exercise on day 14. Cinematography · The exercise
- Film School 101 assignmentsPhoto stories → completed action → process documentary → two-person conversation → short film. This is why week 1 is stills. Article
- No Film School — creative workoutsThe constraint drills on days 1 and 3. Article
- The exposure triangleAperture, shutter speed, ISO — taught as the foundation of photography. Day 5. Explainer
Every day in this deck cites one of these.